Bajorat Media
Deactivate WordPress cron job (WP-Cron) and speed up the website
Learn how to set up the WordPress cron job correctly to optimize the performance of your website and automate all tasks.
If you run a WordPress website, you may need to automate regular tasks like scheduling posts, sending emails to subscribers, or updating plugins. WordPress uses an internal scheduling service called a cronjob to automate these tasks. In WordPress this is done by default WP Cron regulated, which simulates a cron job. However, using WP-Cron on a high-traffic website can cause performance issues and affect your page load times. In this article, you will learn how to run the WordPress cron job via crontab or management software like Plesk to improve the efficiency of your website and ensure that all scheduled tasks are carried out automatically.
Step 1: Understanding the WordPress Cron Job
Before you begin, you need to understand what the WordPress cron job is and how it works. The WordPress cron job is an internal scheduling service that automatically runs WordPress tasks at regular intervals. However, this service only runs when a page on your website is viewed. This means that if there is little traffic on your website, some of the scheduled tasks may not be carried out. To ensure that all tasks are executed, you can run the WordPress cron job via crontab or management software such as Plesk:
Step 2: Access your server
To run the WordPress cron job via Crontab or Plesk, you must have access to your server. Many web hosts usually allow you to access a Plesk or cPanel dashboard to set up the cron job.
If you don’t have access to a dashboard, you may need to access your server via SSH (Secure Shell). If you are unfamiliar with working on the command line and have no experience with SSH, you should consult an experienced administrator.
Step 3: How to disable WP-Cron
To disable WP-Cron and use a proper system cron instead, you can simply paste the following code into your wp-config.php file:
define( ‘DISABLE_WP_CRON’, true );
This line should be right before the line that says “That’s all, stop editing! Happy blogging.” be inserted. However, note that this will prevent WP-Cron from running on page load. If you call it directly from wp-cron.php it will still run.
Step 4: Create a Cronjob Schedule File
After accessing your server, you need to create a cronjob schedule file. This file contains the instructions that the server executes to run the WordPress cron job. You can either create the file manually or use management software like Plesk to create it automatically. If you create the file manually, you can use a text editor like nano or vim. It is important that you specify the instructions for the cron job correctly to ensure that it runs correctly.
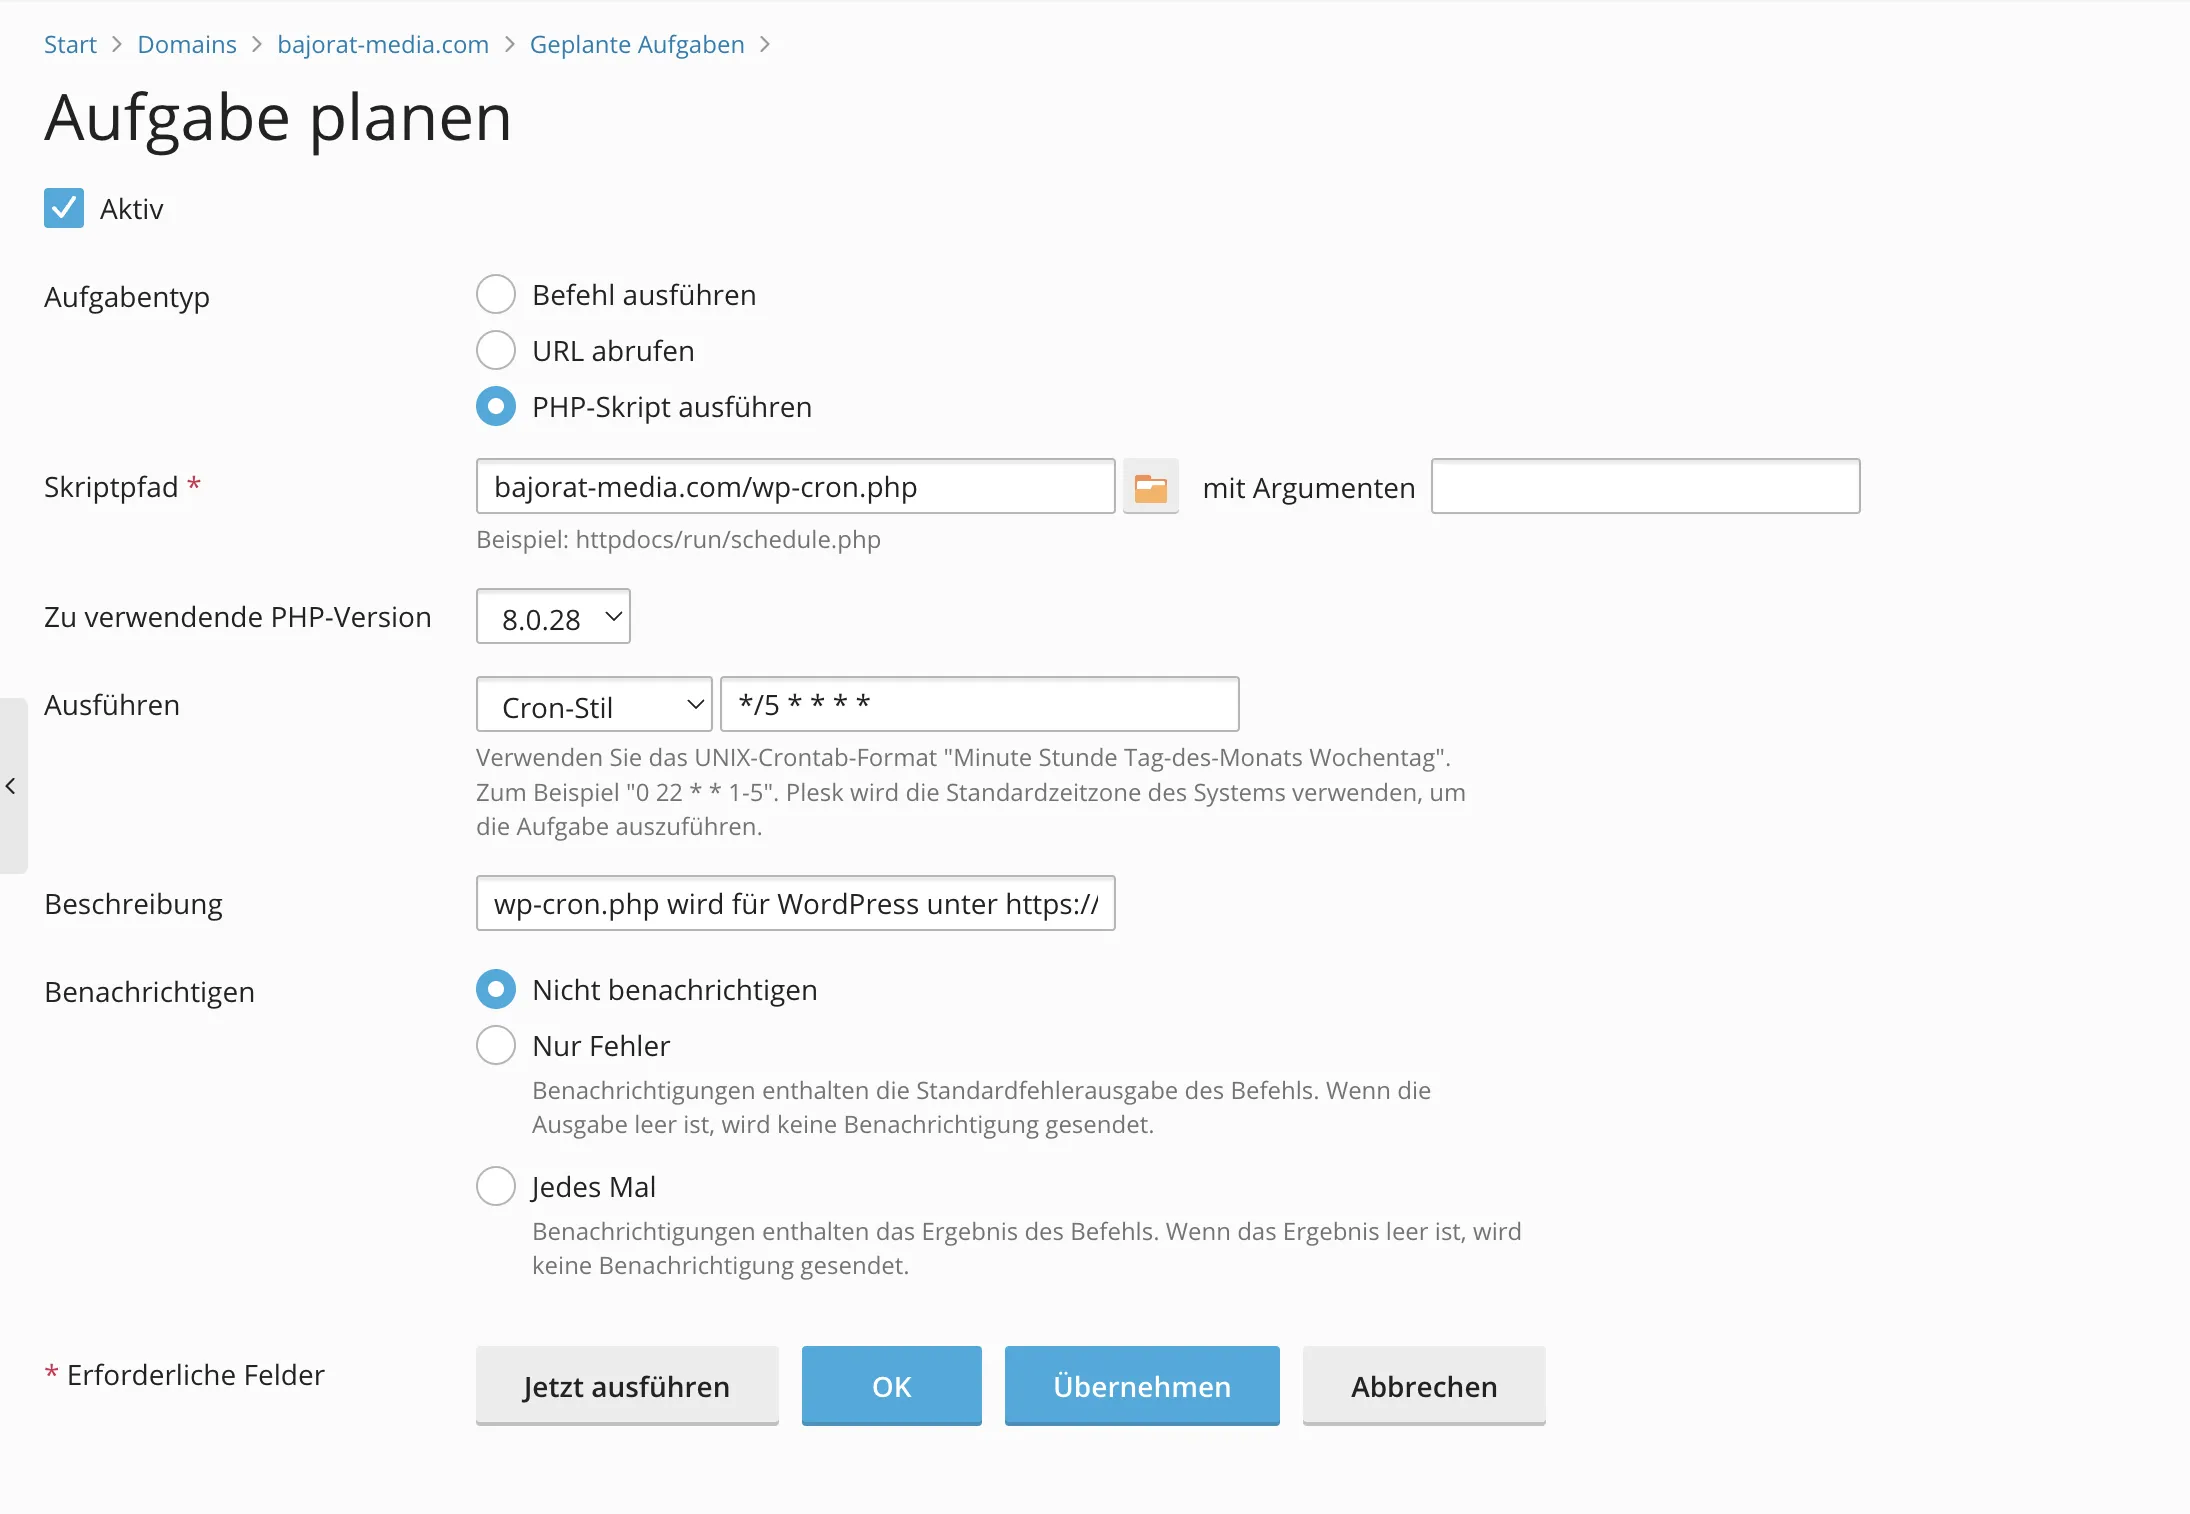
Step 5: Setting up the cron job
Once you have created the file, you need to set up the cron job to run the file. If you use management software like Plesk, you can set up the cron job directly from the dashboard. Otherwise, you can set up the cron job via Terminal or SSH. The syntax for setting up the cron job is as follows:
* * * * * Path/to/PHP/Binary -f Path/to/wp-cron.php > /dev/null
The asterisks (*) represent the time parameters that indicate the time at which the cron job will run. The first star indicates the minute, the second indicates the hour, the third indicates the day of the month, the fourth indicates the month and the fifth indicates the day of the week. You need to specify the path to the PHP binary and wp-cron.php file. Make sure you provide the path to your WordPress installation and that the path to the PHP binary is correct.
Step 6: Save the cron job schedule file
After setting up the cron job, you need to save the cron job schedule file. If you created the file manually, simply save it to the correct directory on your server. If you use management software like Plesk, the file will be saved automatically once you set up the cron job.
Step 7: Testing the cron job
Once you have set up the cron job and saved the schedule file, you can test it. To do this, simply run the cron job manually and check that all scheduled tasks are running. This is important to ensure that your website is functioning properly and performing all necessary tasks. If the cron job runs successfully, you can be sure that it will run automatically on a regular basis. You no longer have to worry about whether your scheduled tasks will be executed or not.
Conclusion
Setting up the WordPress cron job via crontab or management software like Plesk can be a bit complicated, but it is a necessary task to ensure that all scheduled tasks are executed automatically. By setting up the cron job correctly, you can improve your website’s performance and ensure that important functions such as updating plugins, sending emails, and scheduling posts run smoothly. If you are unsure how to set up the cron job or simply don’t have the time, we are here to help you. Our experienced team of WordPress experts can take care of setting up and optimizing your WordPress cron job for you, so you can focus on other important aspects of your online business. Don’t hesitate to contact us contactto learn more about our services and find out how we can help you improve the performance of your WordPress website.
